It can be challenging in Microsoft Teams to schedule messages to be sent in some point in the future, but in this post we’ll take a look at a few options available.
- Use Outlook
- Use Power Automate
- Use Send Later app for Microsoft Teams
Update March 2022: Microsoft is now working on native scheduled message support for Teams. It’s due to ship in the desktop Teams apps in July 2022.
Option 1: Use Outlook
If you have an Office 365 Outlook license, you can setup an automation to send an email to your Teams channel at a date and time in the future.
Note that this approach is only useful for posting new posts in channels - it can’t be used to reply to comment threads on an existing post.
1. First, copy the email address for the channel you want to send the message to. This can be found by opening the Teams app, hovering over the channel name, clicking the ‘More options menu’ (three dots) and clicking ‘Get email address’ as shown in the screenshot below
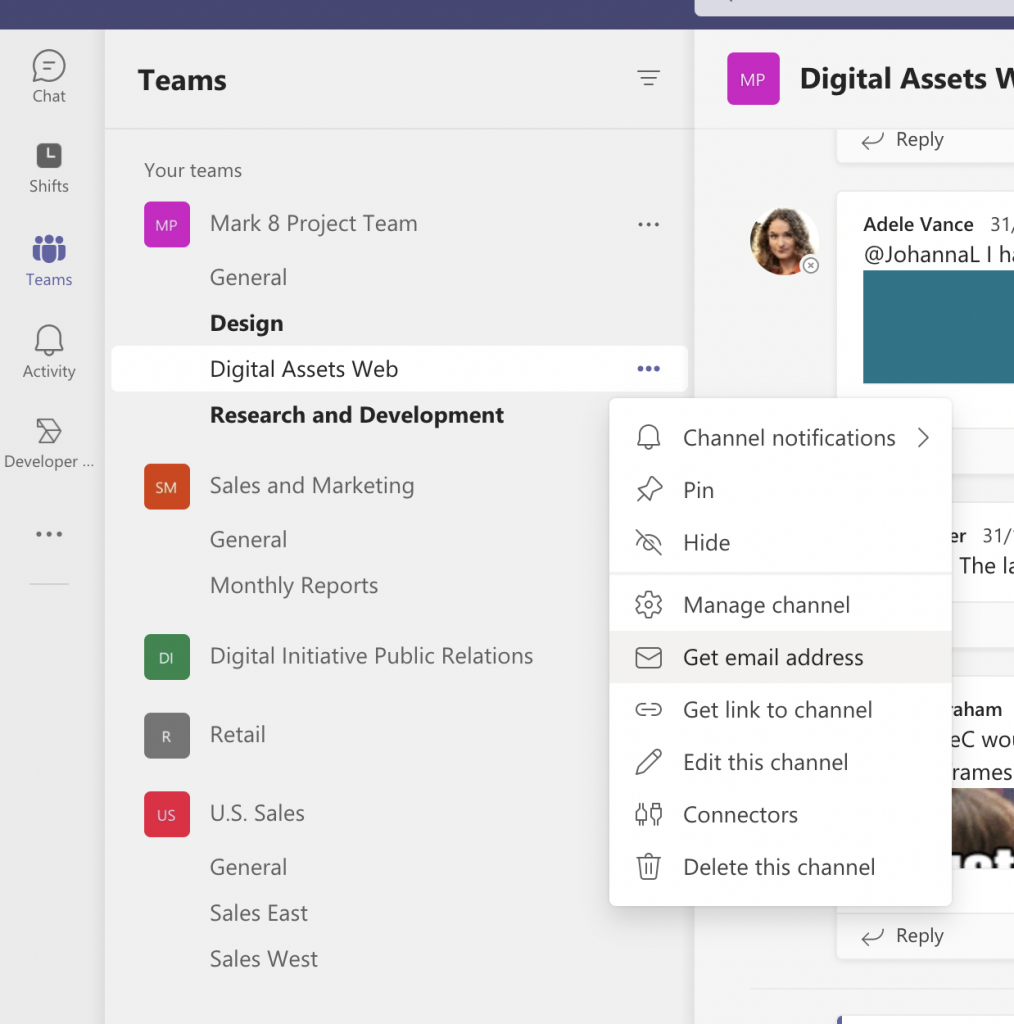
Get channel email address
2. Then login to Outlook on the web. Click ‘New message’
3. In the window that opens, paste your Teams channel email address (from step 1) into the ‘To’ field.
4. In the body of the email, type the message you want to send to your Teams channel.
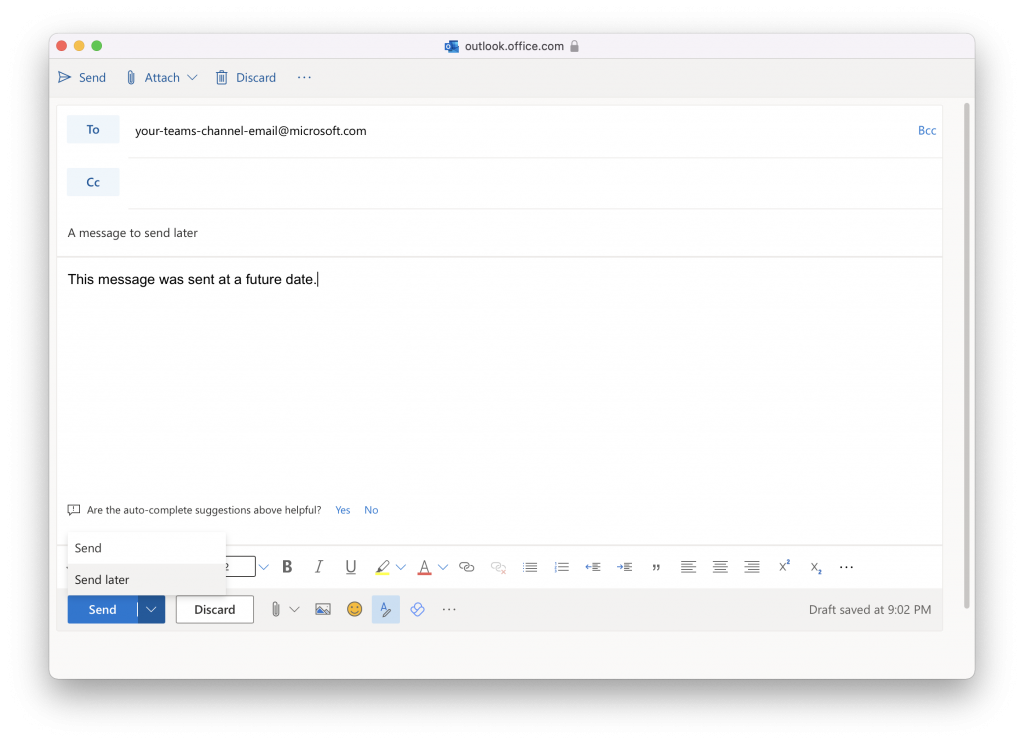
5. Click the downward facing arrow next to the ‘Send’ button and click ‘Send later’.
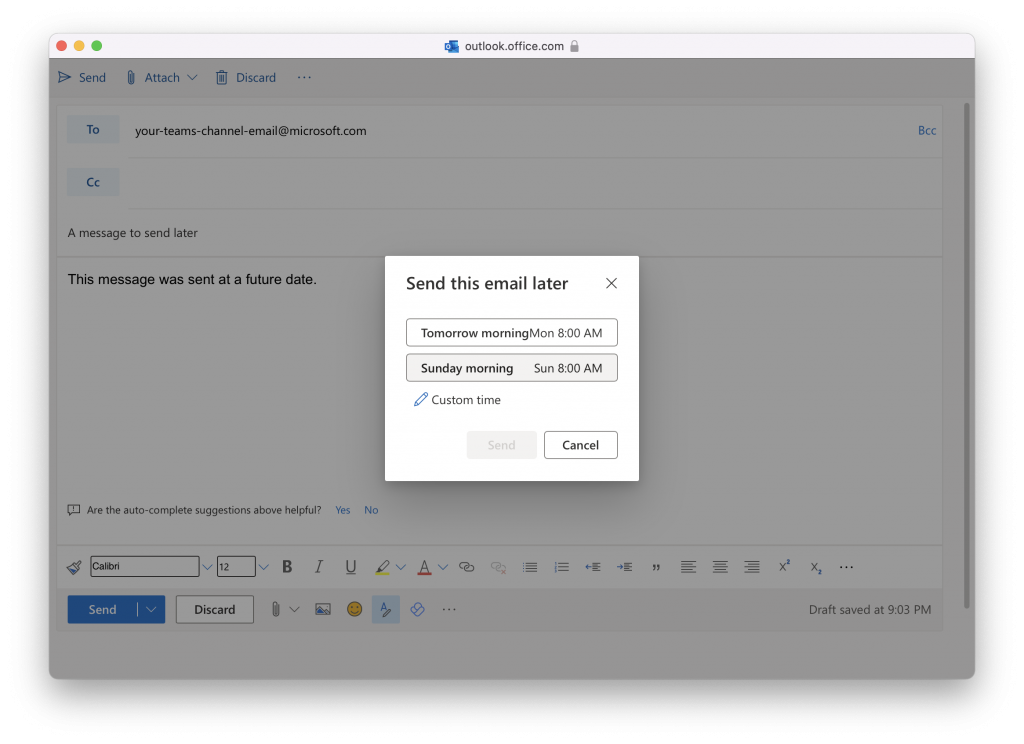
6. Specify the time you’d like to send the email and click ‘Send’. Your message will now be sent to Teams at the time and date you specified.
Option 2: Use Power Automate
This option allows you to post messages to channels either as yourself, or as the Microsoft Flow bot.
It is also more extensible than the first approach, as it allows you to setup custom triggers for when a message is posted - such as when a file is uploaded.
You also have the option of retrieving additional information from other systems that integrate with Power Automate, and including that in the message that is posted to Teams.
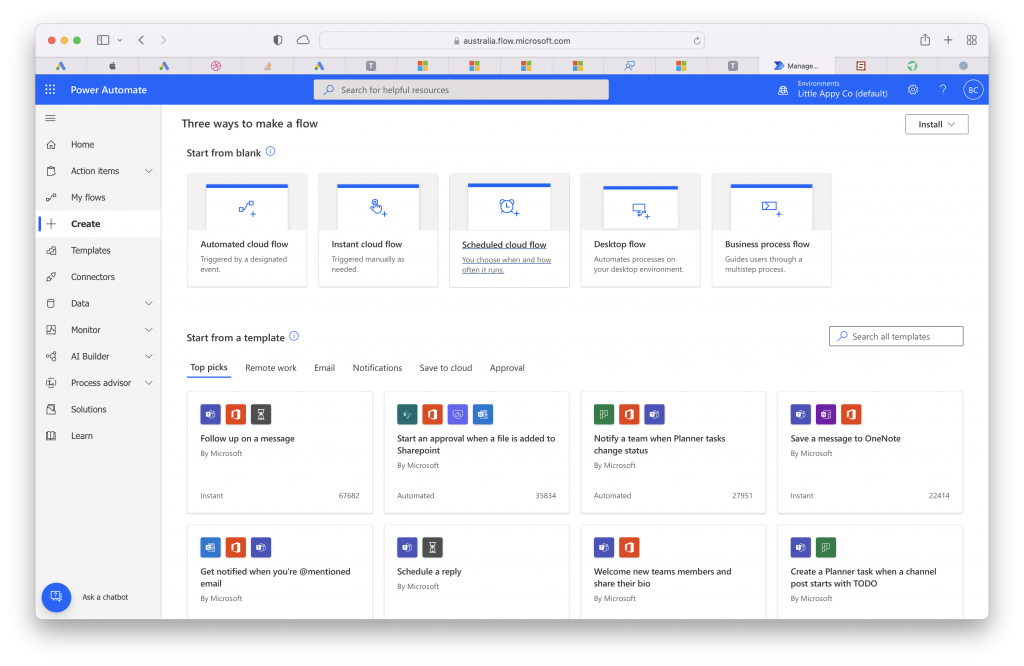
1. First, login to Power Automate. If you don’t have a license, a free tier is available.
2. Click ‘Create’ and choose ‘Scheduled cloud flow’
3. Configure the time and day(s) you want to send the message on. Specify if you’d like it to be a recurring occurrence. You can edit this again later if you’re not sure now.
4. In the screen that loads, click ‘New step’ and search for ‘Post message in a chat or channel’. Click it to add it to your flow.
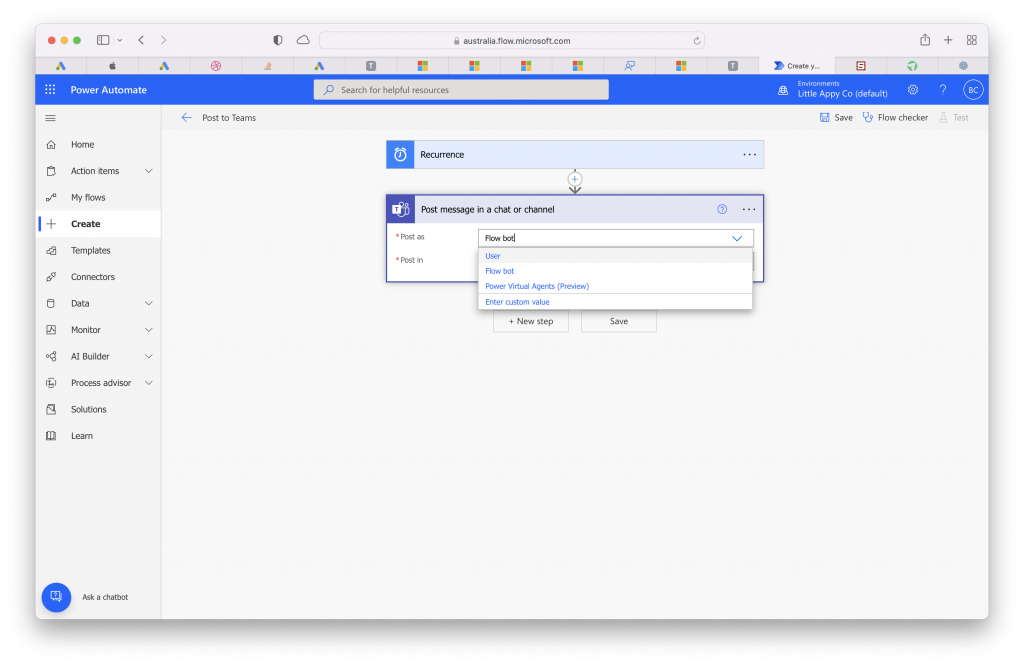
5. Choose whether you want the sent message to come from your Office 365 account, flow bot or Power virtual agent/chat bot.
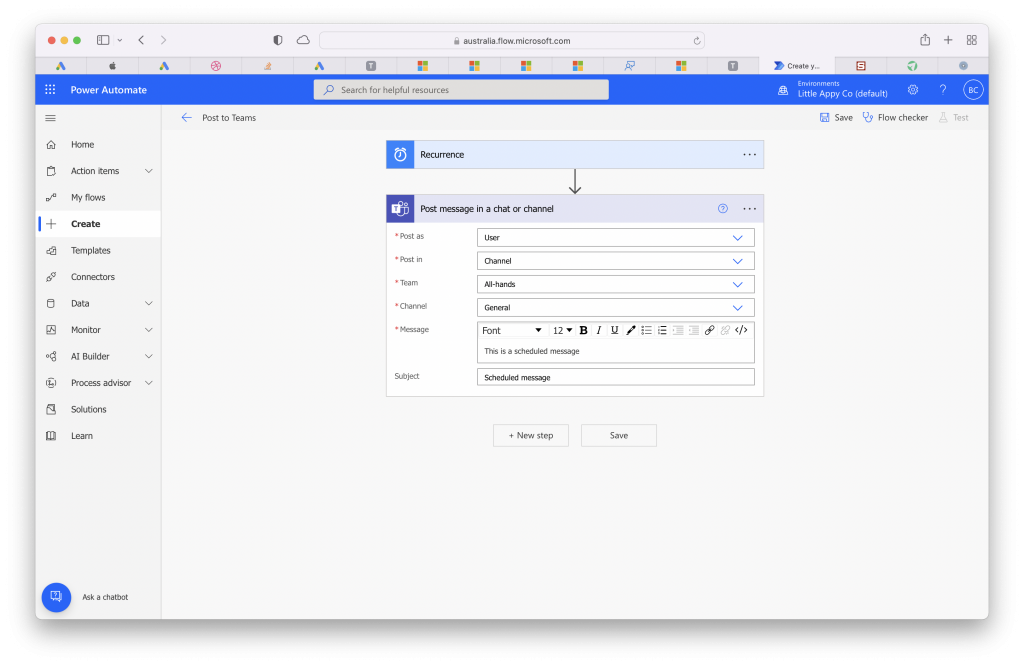
6. Configure the rest of the step, specifying the team, channel, message and more.
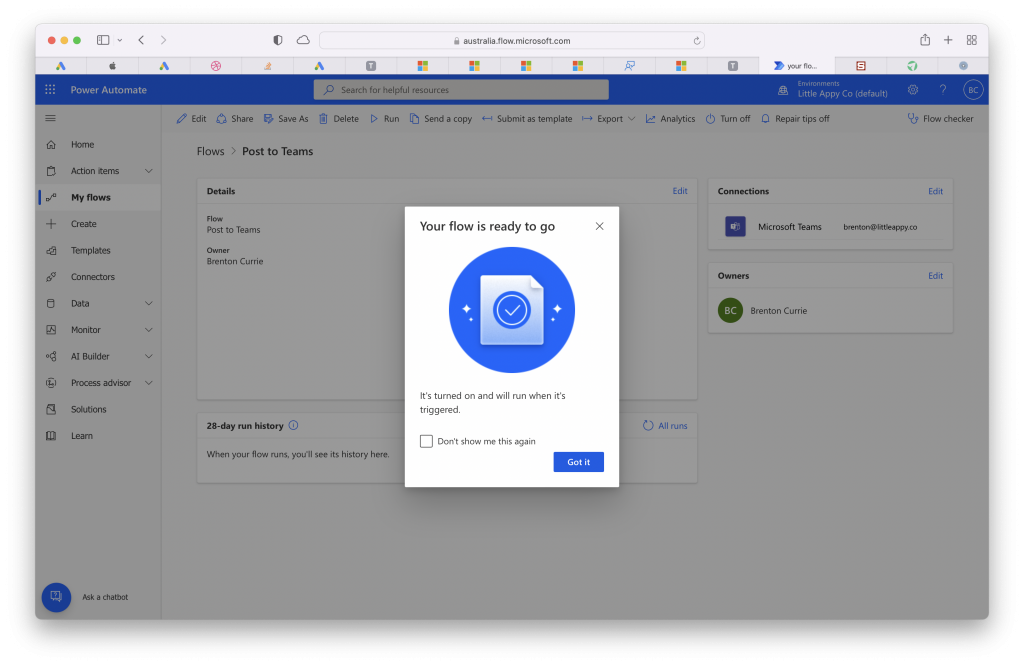
7. Click ‘Save’ and your scheduled message will be ready to send. If you’d like to confirm it’s been setup correctly you can click ‘Test’ in the top right-hand corner of the screen.
Option 3: Use Send Later app for Microsoft Teams
Using the Send Later app is arguably the easiest option to setup, and the most integrated within the Teams experience. It works with both chats and channels.
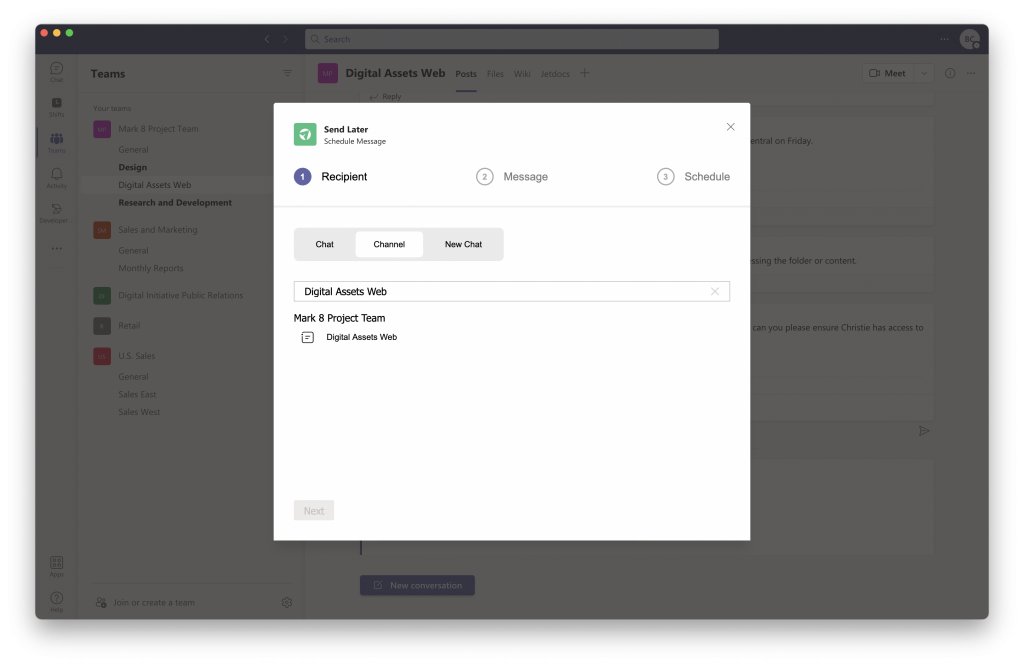
Send Later application for Microsoft Teams
You can schedule messages through out the Teams app, and there’s a tab app that shows you all your upcoming messages.
Keep in mind that this is a paid application, although a free tier is available if you can stay within its limits of 2 users and 10 messages per month.